Thread and Needles: How to Pair Thread Weight with Needle Size
Needle and thread issues can be a serious frustration when working on sewing projects, whether it’s quilting, embroidery, or general machine sewing. Broken threads, skipped stitches, or poorly aligned seams often trace back to one root cause: mismatched needle size and thread weight, which can significantly affect the final look of your projects and is crucial for staying on top of fashion trends. The good news? By learning to pair these properly, you can eliminate these issues and elevate your sewing experience.
This guide will walk you through understanding needle sizing, identifying needle types, and selecting the right thread weight, so your next project runs as smoothly as your sewing machine.
Why Testing Your Needles Matters

Before jumping into your project, always test your needle with your machine and fabric. Additionally, ensure the color of the thread complements the fabric and project requirements. This small step can save your entire project from frustration. A dull or inappropriate needle can damage fabric, cause thread fraying, or even break during use. Testing ensures that your needle is compatible with the material and thread weight you’re working with, creating cleaner stitches and reducing long-term wear on your sewing machine.
Tip: Change out your needle regularly. Sewing needles dull over time and can affect your stitching quality more than you think. Replace them after every 8–10 hours of sewing or at the start of every new project.
Understanding Thread Weight
Thread weight is a crucial factor in sewing and embroidery, as it directly impacts the appearance and durability of your final product. Essentially, thread weight refers to the thickness or heaviness of the thread, which is typically measured in deniers (den) or tex. A lower denier or tex value indicates a finer thread, while a higher value signifies a thicker thread.
When selecting a thread weight, consider the type of fabric you’re working with, the desired stitch length, and the level of detail required for your project. For instance, a finer thread is ideal for delicate fabrics and intricate embroidery, allowing for precise and detailed stitching. On the other hand, a thicker thread is better suited for heavier fabrics and bold stitches, providing the necessary strength and visibility.
In addition to thread weight, the material of the thread—such as cotton, polyester, or silk—plays a significant role in its performance. Different materials offer varying levels of strength, durability, and colorfastness, so it’s important to choose a thread that complements your fabric and project needs. By understanding and selecting the appropriate thread weight and material, you can ensure your sewing and embroidery projects are both beautiful and long-lasting.
Decoding Needle Sizes
Understanding needle sizing is essential when matching needle and thread. Similar to knitting or crochet tools, sewing needles have two size systems—European and American.
-
European Sizes: These range from 60 to 120. The larger the number, the thicker the needle.
-
American Sizes: These range from 8 to 19, also increasing in thickness with larger numbers.
| European size | 60 | 65 | 70 | 75 | 80 | 90 | 100 | 110 | 120 | 125 |
| American size | 8 | 9 | 10 | 11 | 12 | 14 | 16 | 18 | 19 | 20 |
For example, a needle with the size 70/10 has a European size of 70 and an American size of 10.
Use finer needles (lower sizes) for delicate fabrics like lightweight silk and high-thread-count quilting cotton. Thicker needles (higher sizes) work well for heavy-duty fabrics, such as denim or upholstery material.
Various needle sizes are readily available online, making it convenient to find the perfect match for your sewing needs.
Needle Types and Their Specific Uses

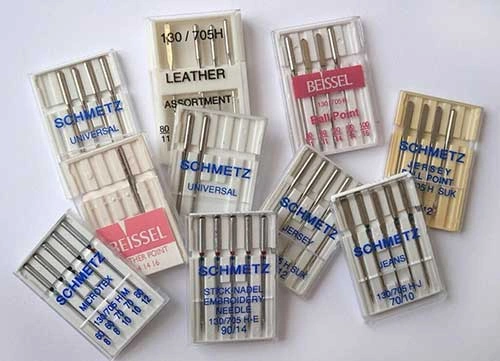
Choosing the right type of needle for your fabric and thread is just as important as using the correct size. Here’s a breakdown of the most common needle types and their applications:
Certain popular needle types are often sold out quickly, so it's advisable to stock up when available.
1. Ballpoint Needles
-
Use: Stretch fabrics like jersey or knits.
-
Sizes Available: 70/10, 80/12, 90/14.
-
Unique Feature: Rounded tips that gently push through fibers without tearing them.
2. Stretch Needles
-
Use: Fabrics containing spandex or high elasticity.
-
Sizes Available: 75/11, 90/14.
-
Unique Feature: Designed for high elasticity to avoid skipped stitches.
3. Leather Needles
-
Use: Leather or suede.
-
Sizes Available: 90/14, 100/16.
-
Unique Feature: Blade-like tip makes clean cuts through tough materials.
4. Jeans Needles
-
Use: Heavyweight denim and other densely woven fabrics.
-
Sizes Available: 90/14, 100/16.
-
Unique Feature: Long, thin point ideal for piercing thick fabric with precision.
5. Quilting Needles
-
Use: Multiple fabric layers, such as during quilting.
-
Sizes Available: 75/11, 80/12, 90/14.
-
Unique Feature: Thin and sharp enough to penetrate layers without causing puckering.
6. Topstitch Needles
-
Use: Decorative stitching with heavy thread.
-
Sizes Available: 80/12, 90/14, 100/16.
-
Unique Feature: A larger eye for thicker threads to pass through easily.
7. Metallic Needles
-
Use: Metallic threads or fabrics.
-
Sizes Available: 80/12, 90/14.
-
Unique Feature: Teflon-coated eye to reduce friction and prevent shredding.
8. Wing/Hemstitch Needles
-
Use: Decorative hems and accents.
-
Sizes Available: 100/16.
-
Unique Feature: Unique “wing” sides to create decorative openwork patterns.
When in doubt, always consult your needle’s packaging for compatibility with your machine and fabrics.
Demystifying Thread Weight Systems
Matching Thread Weight to Needles
-
Light Threads (60wt–100wt)
Use finer needles, such as 65/9 or 70/10, for delicate threads. Ideal for silk, lightweight cotton, or heirloom sewing.
-
Medium Threads (40wt–50wt)
Pair with standard needle sizes like 80/12. Suitable for general sewing and quilting projects.
-
Heavy Threads (30wt–40wt)
Combine with larger needles such as 90/14 and above. Best for topstitching, upholstery, and decorative stitching.
Keeping an eye on new arrivals of thread options can provide fresh choices for your sewing projects.
Factors Affecting Needle Size Selection
Choosing the right needle size is essential for achieving successful sewing and embroidery results. Several factors influence needle size selection, and understanding these can help you make informed decisions for your projects.
-
Fabric Type: Different fabrics require different needle sizes. Delicate fabrics like silk or chiffon need a smaller needle size to avoid damaging the material, while heavier fabrics like denim or canvas require a larger needle size to penetrate the thicker weave effectively.
-
Thread Weight: The weight of the thread also affects needle size selection. A finer thread pairs best with a smaller needle, ensuring smooth stitching without causing damage. Conversely, a thicker thread requires a larger needle to accommodate its bulk and prevent breakage.
-
Stitch Type: The type of stitch you’re using can dictate the needle size. For example, a straight stitch typically works well with a smaller needle, providing precision and control. Decorative stitches, which often involve more complex patterns and thicker threads, may require a larger needle to handle the increased demand.
-
Personal Preference: Some sewers prefer a smaller needle size for greater control and precision, while others opt for a larger needle size for faster stitching. Your comfort and experience level can guide your choice, but always consider the specific needs of your project.
When selecting a needle size, it’s crucial to consult the manufacturer’s guidelines and consider the unique requirements of your fabric, thread, and stitch type. By taking these factors into account, you can ensure your sewing and embroidery projects are executed with precision and ease.
The Match Made in Sewing Heaven
How to Pair Needle and Thread:
-
Fabric First: Always start by considering your fabric. A fine silk will demand a different needle and thread pairing compared to thick denim.
-
Thread Selection: Choose a thread type suited for your stitching needs (e.g., general-purpose polyester for basic sewing, metallic threads for decorative accents).
-
Needle Selection: Match the needle size to complement both the thread weight and fabric type.
-
Test and Adjust: Before starting the project, test your needle and thread pair on a fabric scrap to ensure proper tension and stitching quality.
Fabric
Thread
Needle
Crepe de chine, voile, taffeta
50ne silk, extra fine rPET
60/8 or 65/9
Cotton lawn, organdy, poplin
60ne cotton
70/10 or 75/11
Crafting cotton, linen
40 to 50ne cotton
75/11, 80/12 or 90/14
Denim, canvas, tweed, gabardine
40 to 50ne cotton, linen, 40 to 50ne rPET, 40 to 50ne tencel
90/14 or 100/16
Leather, suede
40 to 50ne rPET, waxed linen, 40ne double mercerised cotton
90/14 or 100/16
Pro Tip: Always have a selection of needles in different sizes on hand to easily accommodate a range of projects.
Troubleshooting Thread Breakage
Thread breakage can be a frustrating and time-consuming issue, especially when working on a complex project. However, by identifying the root causes and implementing effective solutions, you can minimize interruptions and ensure a smooth sewing experience.
-
Check the Thread Quality: Poor-quality thread is often prone to breakage. Investing in high-quality thread designed for sewing or embroidery can significantly reduce the likelihood of breakage. Look for threads that are smooth, strong, and consistent in thickness.
-
Check the Needle Size: Using an incorrect needle size for your thread can lead to breakage. Ensure that the needle size matches the thread weight and type. A needle that is too small can cause the thread to fray and snap, while a needle that is too large can create excessive friction.
-
Check the Tension: Incorrect tension settings can cause thread breakage. Adjust the tension according to the manufacturer’s guidelines, and test on a fabric scrap to find the optimal setting. Proper tension ensures smooth and even stitching without putting undue stress on the thread.
-
Check the Fabric: Some fabrics, due to their texture or weave, can be more prone to causing thread breakage. Ensure that the fabric you are using is suitable for sewing or embroidery and that it is properly prepared (e.g., pre-washed and ironed) before starting your project.
By addressing these common causes of thread breakage, you can take proactive steps to prevent it and ensure a successful sewing or embroidery project. Remember, a little troubleshooting can go a long way in achieving flawless results.
Unlock the Ultimate Stitching Potential
Pairing the right thread weight with the appropriate needle size is the key to perfecting your sewing and embroidery projects. Once you master this alignment, you’ll see fewer skipped stitches, less thread shredding, and a dramatic improvement in stitch quality.
Need more help finding the ideal tools? Visit your local supply shop or consult an experienced sewing professional—and ensure every project is a professional masterpiece. Sign up for updates to hear about the latest sewing tips, tools, and trends.
 Whatsapp: